
I've been having a lot of fun making these little bags lately.
Here's a teeny tiny tutorial-or tip, to go along with the photos ;) Maybe you already do this but if not you may find this handy...
I buy a lot of fat quarters (half a yard cut in half, usually around 18x22 inches for quilting fabrics).
They're great when you need more than a quarter yard but don't want/need to commit to too much fabric.
I had bought 2 of these fat quarters from French General.

Normally I'd just place the typing paper pattern I'd traced out, onto the fabric as close to the edge as possible-if this were an all over print. Or, lined up with stripes or polka dots and so on.
But I wanted to see through the paper so I wouldn't cut off any important parts ;) and also make sure my seam allowances weren't going to cut anything off...
So, I traced the pattern out onto artist's tracing paper(what I had on hand)-and voila.I could move the new clear pattern around, deciding exactly where to pin and cut.

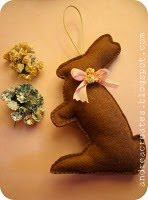
this bag's shaped a little different than the others in the shop.I wanted rounder less flared corners.
You could also trace it onto quilters template plastic. Sometimes freezer paper works depending on the color of your fabric...
I used this technique for both of these little bags and was able to see in advance what and where I needed to cut.


~Have a super weekend~


1 comment:
This is such a neat & helpful tutorial Andrea, thank you! Love your little purses.
Post a Comment